
When you are deep into a demanding multi-day trek or an intense day-walk over the peaks, pack weight becomes everything.
Every single gram counts. Standard potato crisps are a brilliant, savoury comfort on the trail, but they have two fatal flaws for a hiker: they are bulky, and they inevitably get crushed into a sad pile of salty dust at the bottom of your rucksack.
You need a savoury snack that delivers an immense flavour punch, weighs practically nothing, and has absolute structural integrity.
Standard Potato Crisps ───► Bulky Pack, Smashed into Salty Dust ❌
Parmesan Trail Crisps ───► Feather-Light, Rucksack-Rugged, High Sodium ✓
This simple, two-ingredient recipe drops the trendy “keto diet” framing and repositions these bakes as the ultimate Lightweight High-Sodium Trail Crisps.
Made entirely from baked, aged cheese, these crisp discs are crisp, feather-light, and completely rucksack-rugged.
They provide an exceptional mid-walk electrolyte boost that takes up zero space in your kit bag, keeping you fueled and cramp-free on the steepest ascents.
🧀 The Trail Crisp Snapshot
|
Fuel Metric |
Target Setting |
Why It Rules For Backpackers & Hikers |
|---|---|---|
|
Pack Weight |
Ultra-Lightweight |
Weighs a fraction of regular snacks while offering double the calorie density. |
|
The Sodium Hit |
High Bioavailable Sodium |
Actively replaces the critical electrolytes lost through heavy sweating on long hill climbs. |
|
Rucksack Durability |
Rigid & Crumb-Resistant |
Hard-baked cheese discs can be tucked into an ambient pocket without shattering. |
|
Storage Window |
Up to 7 Days |
Keeps perfectly in a small zip-lock bag or tin without needing any refrigeration. |
⚡ The Active Power of Concentrated Dairy Sodium
When you are working hard on a mountain scramble or a brisk fells walk, your body is continuously regulating its core temperature by sweating.
Along with water, you are shedding a massive volume of essential minerals—primarily sodium.
If you only hydrate with plain water without replacing that lost salt, your blood-sodium levels plummet, triggering sudden muscle weakness, mental fatigue, and agonising leg cramps.
These parmesan trail crisps are a concentrated, natural electrolyte replacement. Because parmesan is an aged, hard cheese, its water content has already been naturally evaporated, leaving behind a highly dense matrix of protein, dairy fats, and calcium.
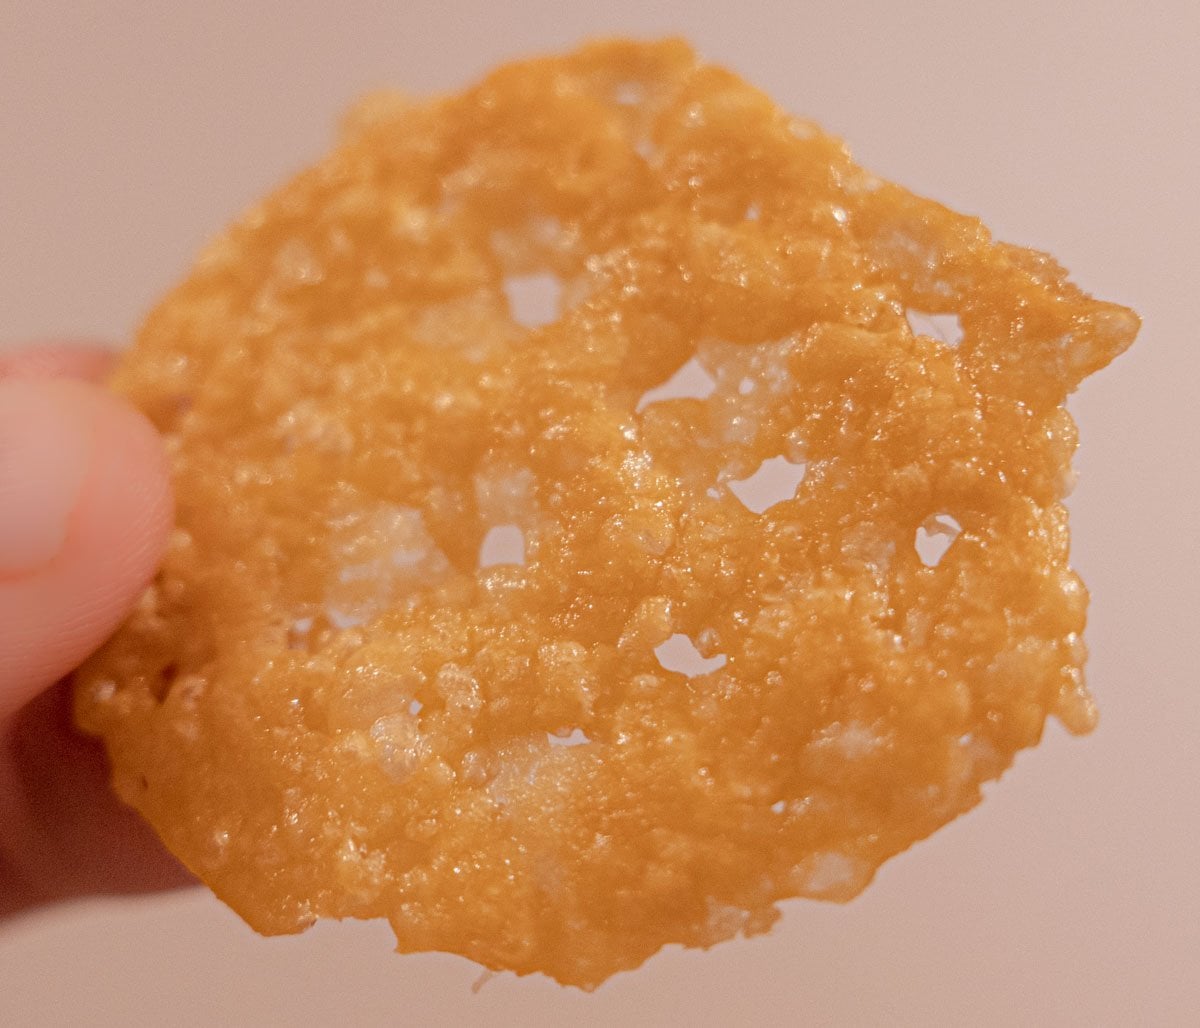
Baking it into a crisp disk caramelises the remaining sugars and creates a hard, snappy wafer.
Tucking a handful of these into your coat pocket gives you a fast, savoury reboot mid-walk that cuts through sweet-snack fatigue and instantly helps your body retain the hydration needed to keep your legs moving smoothly.
🧭 The Master Baking Sequence
The secret to an elite, snappy trail crisp lies entirely in the thickness of your cheese piles and the temperature of your oven.
Rushing the bake on a high heat will burn the cheese and leave it bitter, while baking it too low will result in a chewy, greasy puddle instead of a crisp wafer.
Step 1: Prep and Fine Grate (Time: 5 mins)
Preheat your oven to 200°C (180°C fan / Gas Mark 6) and line a large, flat baking sheet with high-quality non-stick baking parchment or a silicone baking mat.
Finely grate 150g of real Parmigiano-Reggiano or a mature British hard cheese.
Avoid using pre-grated supermarket packets, as they are coated in potato starch to prevent clumping, which ruins the crisp, snappy texture.
Step 2: Shape the Discs (Time: 5 mins)
Spoon the finely grated cheese onto your lined baking sheet in small, neat mounds—roughly one rounded tablespoon per crisp.
Use the back of your spoon to gently flatten each mound into a thin, even circle about 6 to 7 centimetres wide. Ensure you leave a good 2cm gap between each disc, as the cheese will spread and bubble as it melts.
Step 3: Add the Trail Seasoning (Time: 2 mins)
To elevate the savoury profile and add a warming metabolic element for cold days on the fells, lightly dust the top of each cheese disc with a pinch of cracked black pepper, a tiny sprinkle of smoked paprika, or a few dried chilli flakes.
Step 4: The Golden Bubble Bake (Time: 5-6 mins)
Slide the tray into the centre of the oven. Watch it like a hawk—the cheese will melt completely and bubble vigorously.
After 5 to 6 minutes, the bubbling will slow down and the edges of the discs will turn a beautiful, rich golden brown.
The exact second the centres turn golden, remove the tray from the oven.
Step 5: Cool and Set (Time: 10 mins)
Leave the crisps to sit undisturbed on the baking sheet for 5 to 10 minutes.
As they cool, the molten fat re-solidifies, transforming the bubbly cheese into perfectly rigid, snappy wafers.
Once completely cold, peel them gently off the paper and pack them straight into a zip-lock bag or small tin for your rucksack.

Lightweight High-Sodium Parmesan Trail Crisps
These home made keto Parmesan cheese crisps (or chips if you are in the US) are so simple they only have one ingredient, Parmesan Cheese
12
servings10
minutes6
minutes120
kcalIngredients
150 g Parmigiano-Reggiano Cheese (block form, finely grated)
0.5 tsp Coarse Cracked Black Pepper
0.5 tsp Smoked Paprika (optional, for a smoky trail twist)
Directions
- Preparation: Preheat your oven to 200°C (180°C fan). Line a large baking tray with non-stick baking parchment paper.
- Grate: Finely grate your block of hard parmesan cheese using a microplane or the fine side of a box grater.
- Portion: Place tablespoons of the grated cheese onto the baking sheet, flattening them slightly into thin circles roughly 6-7cm in diameter. Leave a clear gap between each circle.
- Season & Bake: Dust the tops of the cheese circles with the cracked black pepper and a touch of smoked paprika. Bake in the oven for 5 to 6 minutes until the discs are fully melted, bubbling, and deep golden brown around the edges.
- Cool: Remove from the oven and let the crisps cool completely on the tray for 10 minutes until they are rigid and snappy. Lift away from the parchment paper and store in an airtight rucksack container.




I just discovered you!
I am now having a spectacular day
Planning my next foodie fun.
Thanks for these delicious healthy recipes.